The point of this task was to get more familiar with css grids. I aimed to use as little divs as possible but I wanted it to be to scale.
You can view it below or on Codepen.
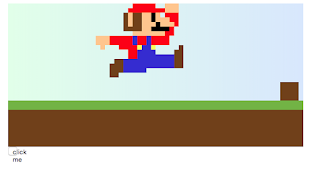
As I was making a 8bit character I made a 64 by 64 grid and made each grid size 8px by 8px. This allowed me to make Mario to scale.
NB: I do not own anything to do with Mario I am just a fan :).

I thought I was done but then....
I thought why not make him do a idle animation, So I looked at some sprite sheets (whats a sprite sheet?) Kirby's idle seemed to be the easiest so I chose to try and achieve that. So my idea was to loop through the parts I wanted to move and make them go down one so it would create a squish motion and then go back to normal.
I did this by setting the ending placement of the blocks by using &.resting in sass then I used a set interval to loop around the divs to toggle off and on the class - creating a resting motion.


I did this by setting the ending placement of the blocks by using &.resting in sass then I used a set interval to loop around the divs to toggle off and on the class - creating a resting motion.
Which is cool but can we make it better ?
Yes is the answer, so I added a floor and a sky and now I might as well make it into a game.

Gaming time
So I will be basically be re-creating the chrome dino game when you are offline. As I know what grid Mario is in I can check when the box reaches it and check if Mario is jumping. If he is jumping and the box makes it passed Mario the game continues and adds to your score, if not game over.

I will be moving the box with another setInterval and once it reaches the end (i < 2) I will reset it back to the start. If it hits then It will give the user a message saying 'game over' and reset the game.
I then moved onto the jumping and did the styles that will be added when you hit the up key (or button) for an amount of time then it will be removed.

I also added a counter for every box you jump to add some method of scoring and I will also be using this count to increase the speed of the box to make it harder as time goes on. I've also added a high score that will save the users highs score to the local storage on their client. I didn't really have a style in mind for this I just went for simple and 8bit (kinda :P).
Thanks for reading, this was a practically fun Sunday funday project and I am happy with it. If you have any suggestion's leave a comment or if you liked it let me know :).
Comments
Post a Comment